
Tonneau Cover Leaking at Front Header? Here's the Fix
A leaking tonneau cover defeats the purpose of bed protection — and the front header is the most common culprit. Whether you're dealing with drips after a rainstorm or puddles forming near the cab, the good news is that most front-header leaks stem from a handful of fixable issues: compressed weatherstripping, misaligned clamps, or clogged drain channels.
We've walked hundreds of truck owners through the tonneau cover leaking fix process, and in this guide we'll show you exactly how to diagnose the source, which parts to inspect first, and how to restore a watertight seal without replacing the entire cover.
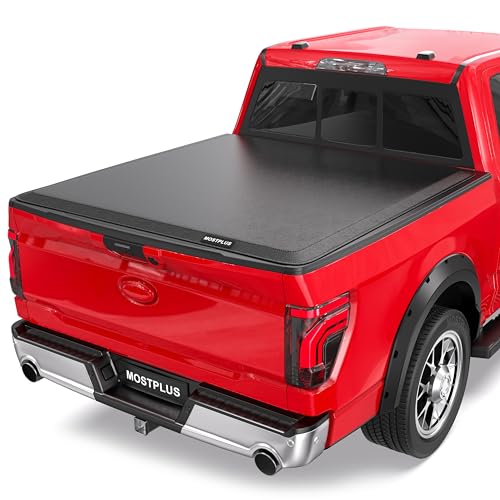
Why the Front Header Leaks More Often Than Other Seams
The front header sits directly against the truck cab, forming a seal that endures constant flexing as you drive and as the cover opens and closes. Unlike the side rails — which benefit from the bed’s vertical walls — the header relies entirely on a rubber bulb or EPDM gasket compressed between two flat surfaces.
Over time, that gasket takes a set: the rubber compresses permanently, leaving gaps where water can seep through. Add in road vibration, temperature swings, and the occasional overload that shifts the cover forward, and you have the perfect recipe for a slow leak. According to the SAE International standards for automotive weatherstripping, even high-grade elastomers lose 15–20% of their compression set resistance after two years of UV and temperature cycling.
If your cover is more than three seasons old and you’ve never replaced the front seal, that’s the first place to look.
Inspect the Bulb Seal and Clamp Alignment
Start with the cover fully closed and latched. Run your hand along the inside edge of the front header where it meets the cab — you’re feeling for gaps, tears, or sections where the rubber bulb has flattened completely.
Next, open the cover and examine the clamp brackets that hold the header bar in place. Many hard folding and retractable covers use a pair of bolt-down clamps at each corner; if one has worked loose by even a quarter turn, the entire header can tilt forward and break the seal. Tighten each clamp evenly — torque them in a crosshatch pattern, not side-to-side — so the bar sits parallel to the cab wall.
If the bulb seal itself is cracked or permanently flattened, replacement header weatherstripping is inexpensive and installs in minutes with the same adhesive backing or slide-in channel your original used.
Check for Clogged Drain Tubes on Folding and Retractable Models
Hard folding covers and canister-style retractables often route water through small drain tubes that exit near the bed stake pockets. When leaves, dust, or dried sealant clog those tubes, water backs up and overflows at the front header instead of draining cleanly.
Locate the drain ports — they’re usually molded into the underside of the front rail or the canister housing. Disconnect the rubber tube and blow compressed air back through the channel; you’ll often dislodge a plug of debris that’s been sitting there for months. Flush the tube with water to confirm flow, then reconnect it and test the cover with a hose.
If you’re comparing cover styles and want a design with fewer leak points to begin with, our soft roll-up versus hard folding guide walks through how drainage systems differ across formats.
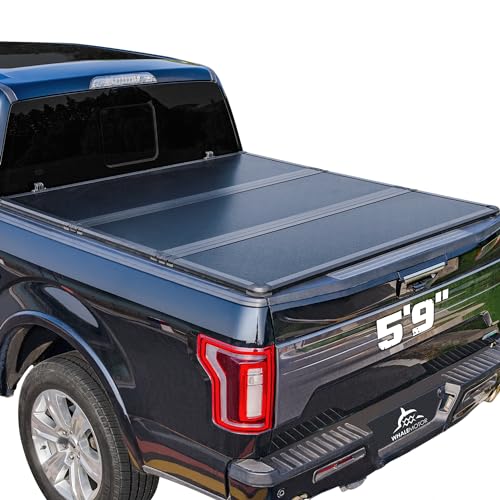
Adjust or Replace the Front Latch Striker Plate
Even a perfect seal won’t stop leaks if the cover isn’t pulled tight against the cab. The front latch — whether it’s a rotary handle, slam latch, or push-button design — relies on a striker plate mounted to the header bar.
If that plate has shifted or bent, the latch may appear closed while leaving a millimeter gap that lets water through. Loosen the two bolts holding the striker, press the cover firmly against the cab, and retighten the plate in the new position. You should feel noticeable resistance when you close the latch; if it clicks shut with no effort, the striker is too far forward.
Some off-road owners running aggressive 4×4 setups also add a secondary rubber bumper to the striker plate for extra compression when the truck flexes on uneven terrain.

When to Add Sealant Versus Replace the Seal Entirely
Silicone or polyurethane sealant can bridge small gaps in an otherwise sound gasket, but it’s a temporary fix — and it makes future seal replacement messier. Use sealant only if the bulb itself is intact but you’ve identified a specific spot — a corner joint, a splice, or a mounting seam — where the seal wasn’t bonded properly from the factory.
Apply a thin bead along the inside face of the gasket, close the cover to spread the sealant evenly, then let it cure for 24 hours before exposing it to water. If the entire length of the bulb seal is compressed or cracked, skip the sealant and replace the whole strip instead.
Replacement is faster than it sounds: most bulb seals either peel off an adhesive backing or slide out of a U-channel molded into the header bar. Measure the old seal’s length and cross-section profile before ordering — a quality folding cover like the BAKFlip MX4 uses a 5/8-inch D-bulb profile, while many soft roll-ups use a smaller 1/2-inch round bulb.
Getting Back to a Watertight Seal
Most front-header leaks come down to a $15 bulb seal or five minutes with a wrench — not a failure of the entire cover. Start with the clamps and striker plate, move to the drain tubes if your design has them, and replace the weatherstripping if the rubber has lost its spring.
Once you’ve made the fix, test it with a hose before the next rainstorm so you’re confident the seal is tight. A properly maintained tonneau cover should keep your bed dry for years, and knowing how to tackle the most common leak point means you’ll never be caught off guard by a puddle near the cab again.
Common Questions About Front Header Leaks
Close the cover and spray it with a hose, starting at the tailgate and working forward. Watch for water dripping inside the bed.
If drips appear near the cab before you've sprayed the sides, the front header is leaking. If they appear along the bed rail first, the side seals are the issue. Most side-rail leaks show up as streaks on the inside bed wall; front-header leaks pool on the bed floor near the cab.
Yes, in most cases. Tightening clamps, adjusting the striker plate, and replacing the bulb seal can all be done with the cover installed.
You'll need to open the cover fully to access the header hardware, but you won't need to unbolt the side rails or remove the assembly from the truck. Only canister-style retractables sometimes require partial disassembly to reach the front drain tubes.
Plan to inspect it annually and replace it every three to four years, or sooner if you park outdoors year-round. UV exposure and temperature cycling degrade the rubber faster than mileage does.
If you notice the seal has taken a permanent set — it no longer springs back when you press it — replacement is due regardless of age.
A slow leak won't rust a modern spray-in bed liner, but it will soak anything you're hauling and can lead to mold or mildew if water pools in corners.
More importantly, repeated moisture cycles can corrode the cover's own mounting hardware and the bed stake pockets, making future repairs harder. Fix the leak as soon as you notice it rather than waiting for visible damage.
Most covers use standard hex-head bolts or Torx screws that require only a socket wrench or multi-bit driver. A torque wrench helps if you're reinstalling the header bar from scratch, but hand-tightening in a crosshatch pattern works for minor adjustments.
Keep a tube of marine-grade silicone and a roll of replacement bulb seal in your truck toolbox for quick fixes on the road.
Yes. Clean the header gasket and cab surface every few months with soap and water to remove road grime that can compress the seal.
Apply a silicone-based protectant to the rubber bulb twice a year to slow UV degradation. And retighten the clamp bolts each spring — they can work loose over winter freeze-thaw cycles even if the cover itself stays intact.